Cinematic Photo Editing Lightroom Presets – Friends, the craze for cinematic photo editing is gradually growing and becoming very popular. Recently we have seen a lot of videos and photos on Instagram and other social media apps featuring cinematic photo editing with people discussing cinematic photo editing techniques. Every content creator wants their ordinary photos to be transformed into cinematic-looking images like movie stills. In cinematic photo editing, unless we incorporate things like the perfect color tone, dramatic lighting, and a slightly dark, moody tone, the photo simply won’t have that cinematic look. But the problem is that not everyone has advanced photo editing knowledge. Because of this many people want to do cinematic photo editing but due to a lack of proper knowledge they are unable to achieve good results. So keeping all these things in mind in this article we are sharing cinematic Lightroom presets.
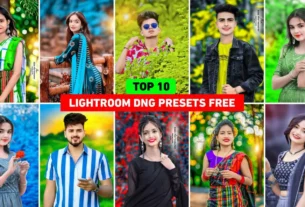
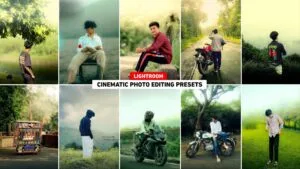
Cinematic Photo Editing Lightroom Presets
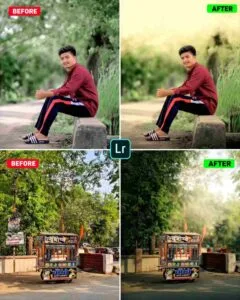
In this article, we will provide Three To Four different types of cinematic presets for cinematic photo editing, which will work on almost every type of photo. Whether your portrait photo was taken outdoors or indoors. These presets will work very well on all types of photos. If one preset doesn’t work you can try using another one. These presets offer options such as warm cinematic tones teal-orange looks dark moody cinematic styles and soft film styles. In paragraph three, we have shown some before and after photo images that demonstrate cinematic photo editing. By looking at them you can get an idea of how good this preset is. You can apply Lightroom presets to your photos and if anything looks wrong you can adjust the exposure or contrast slightly as needed to achieve the perfect look. I will also explain how to use and install the presets.
Cinematic Photo Editing Lightroom Presets
How To Use Cinematic Photo Editing Lightroom Presets?
Editing cinematic photos using Lightroom presets is incredibly easy. All you have to do is save all the Lightroom presets we’ve provided in this article to your phone. After that you will need the Lightroom app which you can easily install from the Play Store. We have provided several presets in this article. Save all of them to your phone because if one preset doesn’t work you can try using another. Let’s learn step by step how to edit photos using Lightroom presets.
- First install the latest version of Lightroom.
- Open the app and select a preset.
- Click on the three lines in the top right corner and then click on Copy Settings.
- Select all the tools that are visible there and right-click on them.
- Now select the photo you want to edit.
- Then click on the three lines in the top right corner again.
- Now you will find the Paste settings option there; click on it.
- The color grading in your photo will be the same as the preset you used on the sample photo.
- Click on the three dots, then click on “Save to” or “Copy” to save the photo.
Install Cinematic Photo Editing Lightroom Presets
Now you’ve learned how to edit your photos in the Lightroom app by copying and pasting any Lightroom preset including cinematic presets. Now to edit photos using Lightroom presets, you’ll definitely need a preset so in this article we’ll be discussing the cinematic photo editing Lightroom preset and how you can save it to your device. In this paragraph you will find the same cinematic preset that we talked about.
First click on the button labeled “Presets.” A Google Drive file will open. You will now see all the presets. To save a preset to your phone click on the desired preset and then click on the download icon at the top of the screen to easily save it to your device.
Can Do Cinematic Photo Edit Without Using Presets.
Yes even without presets you can easily give a normal photo a cinematic look by manually adjusting the exposure, contrast, tone curve and color grading in Lightroom. You just need the basic Lightroom tools and a little bit of editing knowledge. You’ve probably noticed that in cinematic photo editing, the focus is primarily on mood, color tones, and light balance. Which can be controlled better with manual editing. To perform cinematic photo editing without Lightroom presets you will need to apply different color tones to each photo individually. In manual cinematic photo editing the first step is to control the exposure and contrast giving the photo a slightly darker, more dramatic, and film-style feel. After that, depth is created by balancing the highlights and shadows. In the case of color, the saturation is not kept too high; instead, natural and soft tones are preferred.
Conclusion
In conclusion, if you also want to edit any of your photos to give them a cinematic look, then our article today on Cinematic Photo Editing Lightroom Presets could be the best option for you. Cinematic photo editing doesn’t solely depend on Lightroom presets; a perfect cinematic look can be created even without presets by using proper light control, color grading, and tone balance. We have provided various types of presets that you can use one by one to try out cinematic photo editing. Additionally, if you need any other type of Lightroom preset, you can check our website’s Lightroom Presets category.